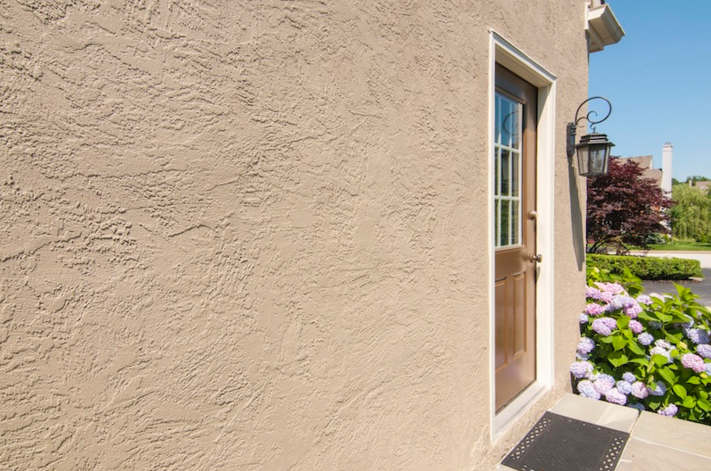
How Stucco Repair Is Done
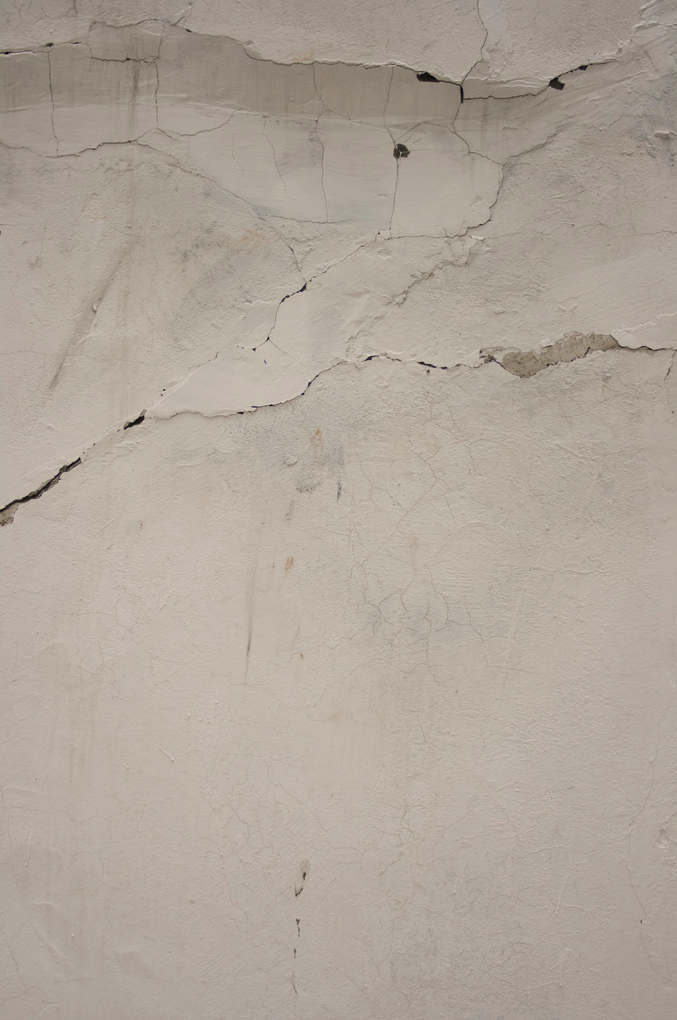
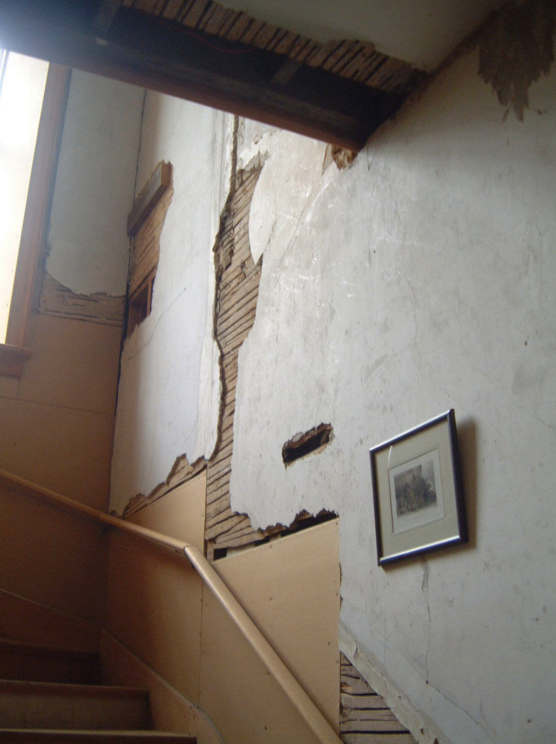
Stucco can endure for 100 years or more, but that doesn’t mean it is impervious. Cracks and holes that develop in the surface let in water that can quickly lead to further damage to the stucco and the underlying surfaces. Patches of stucco can also break free from the wood or metal lath is it adhered to, resulting in loose areas that can grow over time. In this way, small holes often turn into bigger ones, along with more moisture exposure and damage.
Remove the Loose Stucco
Remove all loose or otherwise damaged stucco in the repair area by tapping it with a hammer and a cold chisel. Break away the loose pieces until you reach solidly adhered stucco along the entire perimeter of the area. Be careful not to damage the underlying wood lath or sheathing. If there is metal lath under the stucco, cut it out along the perimeter, using metal snips. Remove all nails or screws securing the lath, and remove the lath from the wall.
Add Building Paper
Cut two pieces of grade D building paper to fit the patch area. Each piece should cover all exposed wood materials to create an effective moisture barrier.
Staple the first piece of paper to the wood lath or plywood sheathing, as applicable. Staple the second piece of paper over the first.
Install Metal Lath
Cut a piece of galvanized metal mesh stucco lath, using metal snips. As with the building paper, the lath should match the repair area so there are no gaps between the lath and the edges of the original (well-adhered) stucco.
Position the lath over the building paper and fasten it with galvanized roofing nails. The nails must be long enough to penetrate 1 inch into the wood framing members behind the original lath or, if the wall has plywood sheathing, nails should penetrate the full depth of the sheathing.
Mix the First Batch of Stucco
Mix a batch of quick-setting repair stucco, following the manufacturer’s directions, using a drill and mixing paddle or, for large quantities, a mortar mixer.
Keep the mixed stucco in a shaded area, and be ready to apply it as soon as it is mixed. Quick-setting stucco typically has a working time of 45 minutes or less, so mix only as much as you can apply in that time.
Apply the Scratch Coat
Spray the edges of stucco around the patch area with water (to prevent premature drying of the new stucco). Scoop a fist-size amount of wet stucco onto a trowel, then sling the stucco onto the metal lath to embed the wet mix into the openings in the mesh. The stucco should be able to hold onto the mesh by itself.
Repeat the process to cover the entire patch area, then smooth the stucco into a flat, even layer that is within 1/2 inch of the original stucco surface. Carefully press and smooth the wet stucco along the edges of the patch to bond the new stucco with the old.
Scarify the scratch coat with a trowel or scarifier, then let the coat cure as directed the mix manufacturer. You may need to water-cure the stucco by spraying it with water periodically. Curing may take only one to two hours, depending on the conditions and the stucco product.
Apply the Brown Coat
Mix a batch of stucco for the second, or brown, coat. Trowel the stucco onto the patch surface in a smooth, even layer that is recessed 1/8 inch from the surrounding original stucco. Let the brown coat cure as directed, misting with water, as applicable.
Apply the Final Coat
Mix a batch of stucco for the final, or color, coat. This coat can be a standard or custom-order color to achieve the desired look. However, it is very difficult to color-match a patch so that is blends with the surrounding stucco; hiding a patch completely often requires painting or coating the entire wall with a compatible paint or pigmented coating.
Apply the final coat with a trowel so it is flush with the surrounding area. Texture the coat, if desired, to match the original finish. Let the stucco cure as directed.
Common Problems with Stucco Homes
You’ve probably seen or heard of house hunting TV shows. The real estate agent and potential homebuyers evaluate the home’s location, bed and bath count and interior color choices. But the home’s siding rarely gets airtime. As a contractor, this concerns me, because siding is one of the key elements that determines curb appeal, not to mention its function of protecting the home from nature’s elements. Stucco siding requires careful consideration. Here’s what you need to know!
Stucco installation
As is the case with any home improvement material, stucco’s reliability depends heavily on how it was installed. Unfortunately, because stucco is comprised of several layers, there are several opportunities for an inexperienced contractor to incorrectly apply the material. One of the most common installation errors is incorrect flashing. Water intrusion, which can cause expensive damage, is a consequence of this.
If stucco sand becomes mixed with soil around the home, cracking can occur. While cracking can be repaired, the homeowner is most often the party responsible for bearing the burden of the cost. Even more troublesome is the fact that many installation issues don’t appear until several years down the road.
Water damage
In order to maintain its integrity, stucco must be kept moisture-free. It’s vital that gutters and downspouts are installed in a manner that directs water away from the home. Special care must be taken to ensure that doors and windows are tightly sealed so that water can’t permeate the stucco.
Paint color commitment
Opting for stucco on your home requires forward thinking, as this siding material can last more than 50 years. In order to update the color, the stucco must first be sandblasted. Skipping this step can create future issues with moisture.
Tips for Painting Stucco
To avoid different shades of color on your home, stucco walls should all be painted at the same time. Don’t be tempted to just paint the areas that need it. Use this time to closely inspect all the walls to identify problems (cracks, mold, pests) before they get worse.
Before painting stucco, always begin with a dirt-free surface by power washing the walls. Scrubbing the lower 1/3 of the wall with detergent and a stiff brush will remove excess dirt. Stucco paint can be rolled or sprayed on. While spraying is faster, it doesn’t always result in the fullest coverage. Brushing is not recommended.
If spraying, back rolling is a professional technique for ensuring complete coverage: Immediately after spraying a wall, have someone follow behind and roll the fresh paint with a lambs’ wool paint roller. This pushes the paint into cracks and crevices the sprayer cannot reach.
Always apply two coats of paint.
THERMAL BREAK
The new stucco systems include an additional insulation layer of Styrofoam, a feature I love because it provides more of a thermal barrier. This is known as an exterior insulation and finish system (EIFS). An acrylic-polymer coat of stucco is applied onto a base of mesh and foam board insulation. EIFS has higher plasticity, which means it has more resistance to cracking, but it is more vulnerable to high impacts such as hail or hockey pucks, than traditional stucco siding.
For my money, new synthetic stucco – if used with a high-strength backer mesh and high-compression foam – is the way to go.
Repairing Stucco Saves You Money
If you already have plaster or stucco on your walls, removing it entirely can actually be more costly than simply calling in the professionals for repair. Even after you take off the surface layer, you’re then faced with the cost of installing an entirely new interior surface. If your home already has plaster or stucco, quality care and upkeep are investments that just make sense.
There are clearly plenty of reasons to have and keep up plaster and stucco walls, but repairing old or damaged surfaces takes the touch of a skilled craftsman. So what can you do? Call in the pros, of course. Homeowners can avoid messes and mistakes by having an experienced professional handle their repair. They can assess the current state of your walls to answer questions like:
- How well is your plaster or stucco attached to its lath (meaning the wooden slats that attach it to the wall’s framework)?
- Is it salvageable at all?
- How is the surface quality?
They will then decide exactly what the best technique is to reattach your layer of stucco or plaster to the lath, repair surface damage, and repaint it to get the exact look you want.